 On To The Fingerboard:
First I re-bound the fingerboard with a layer of maple and one of Ebony, adding a tasty line around it, and then came up with some designs for the inlays, and decided on a twist to traditional and now rare block inlays with triangles.
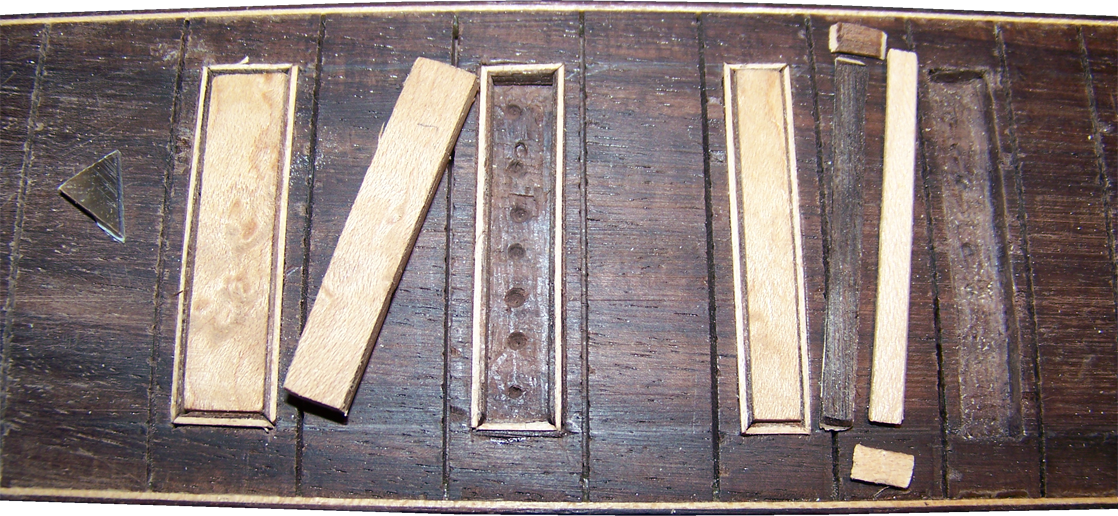
I cut out the rectangles from the fingerboard with my Dremel on the precision router base of my own design and making, but ran into some trouble, as the rosewood was so hard, dry and brittle, that it tore out in a few spots, and I had to glue the pieces back in. of course some of them went flying, and being lost forever, I had to graft some ebony in where the missing pieces were.
I framed the rectangles with a layer of maple, and then one of ebony, and even mitered the corners. Then I grabbed some maple I had left, and made rectangular blocks to fill the frames, which looks like this:
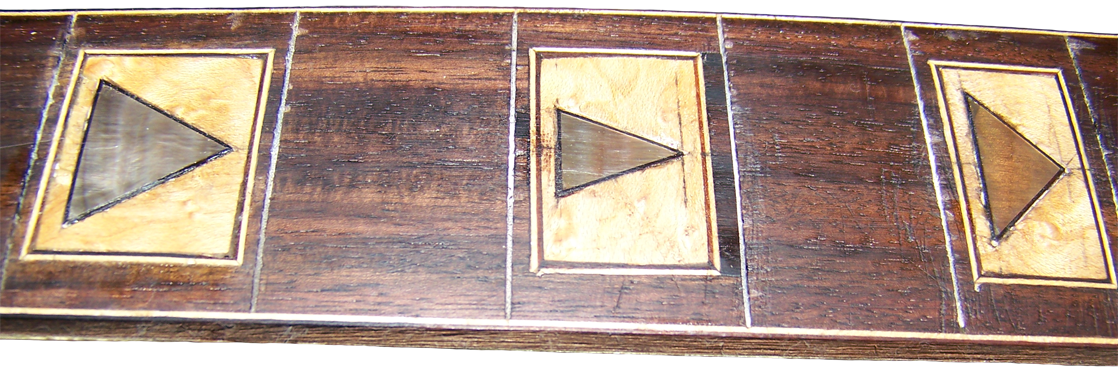
I started cutting triangles out of the black lip pearl, and found out that it is much harder than MOP or abalone, almost as hard as glass! It is beautiful to look at as it has all kinds of iridescent colors, including silvery shades of gray, greens, reds orange and even a little gold. It is also murder on cutting tools, and can dull them easily.
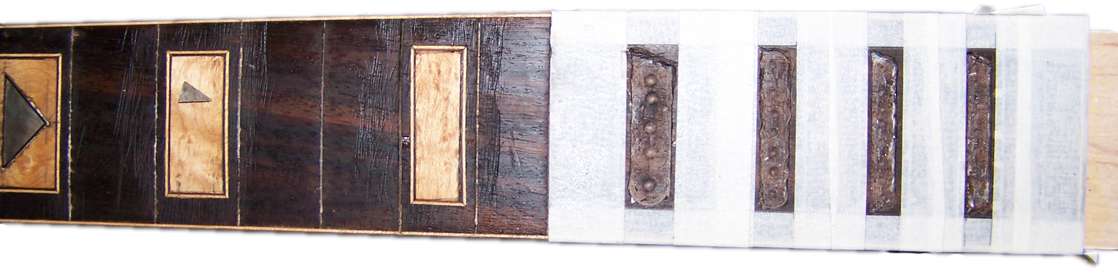
In order to avoid getting blisters on my hands I changed up cutting frames, maple blocks and MOP triangles, glued in parts and sanded inlays flush to the fingerboard. I also framed each triangle in ebony for a little added detail. Here's another in between stage, where the tape acts as a template for me to follow with the Dremel:
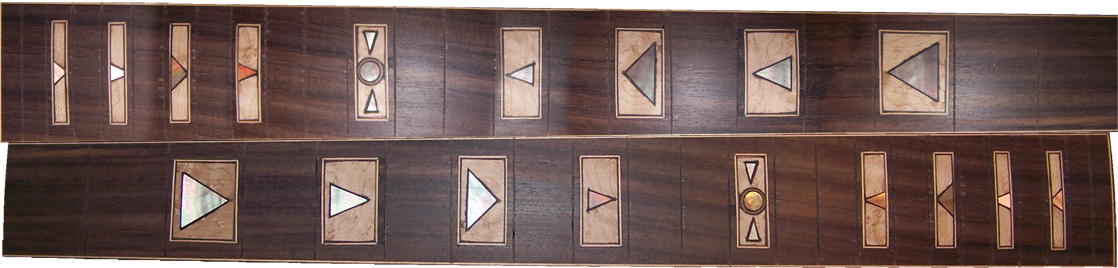
Now you are probably wondering why I gouged so much of the fingerboard with my rasp: The radius of the fingerboard was to tight, and the bow inaccurate, so It needed to be leveled quite a bit to have an excellent feel and action. I could go nuts a little without worry, and save some time while at it. Now here is a closer view after rough leveling. It is by no means finished yet, but I still have work on the headstock to do, and it is not a good Idea to fine finish anything until one is completely done with more brutal tools.
Here is the rough fingerboard, and although one of the two photos is flipped around they were both taken with similar camera angles. I tried to get two distinct color variations of the shell, but my camera and lighting situation was not playing along. You just have to imagine it for now, maybe I will get some better shots during other stages of the build, like after I apply a few coats of polyurethane to the fingerboard. And if you are wondering why I would do that, I let you know that it will protect the pores of the woods from dirt and grime and drying out. The only reason no one else finishes rosewood, is because they can get away with it as a time saver, as you can not see the grime on dark woods as well, and although ebony has such fine pores it is not necessary, rosewood holds dirt and therefor bacteria like crazy, and although maple is antibacterial by nature, it is soft enough to wear quickly, and therefor always finished.
Some Headstock Work:
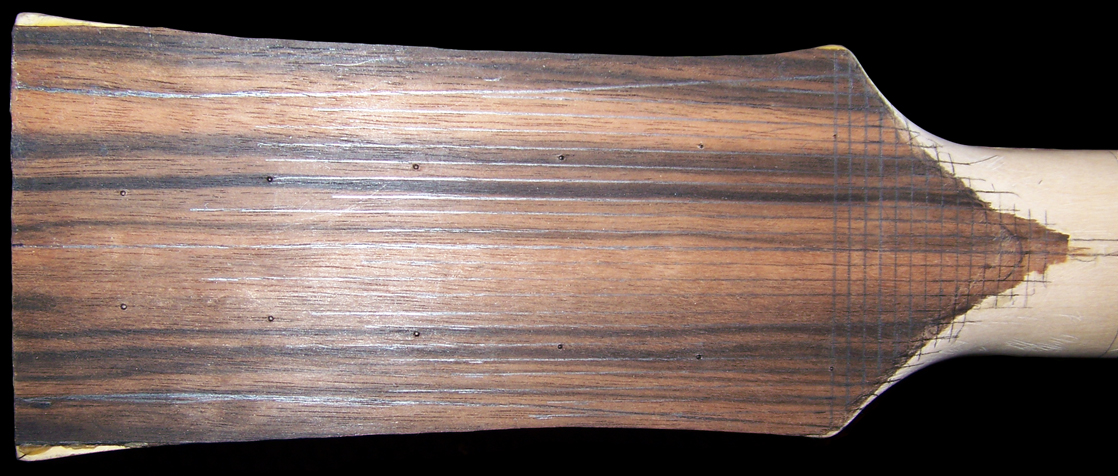
An overlay AKA capping adds mass and stability to a headstock, and the additional mass also adds some sustain to the instrument, and in this case they also cover up plugged tuner holes. First I add a layer of the Macasar ebony to the back of the headstock, and mark the new tuner holes, like so:
Then I lay out the new tuner positions, keeping in mind that we don't want any tuning problems down the road, but still want a good look, First I lay them out in the front as well as the new shape of the headstock:

Then I drilled the tuner holes to fit the tuners properly, in two stages, at 3/8" for the base, and 5/16' for the threaded nuts:
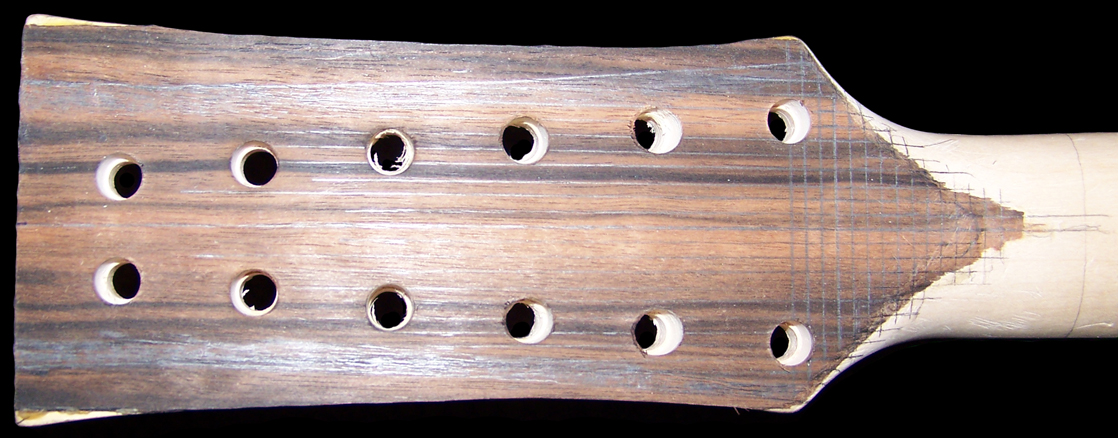
Here is the front, notice the new layout compared to the original, I could plainly see that it was off center, but now one can really see how much! As a matter of fact this time I measured three times, just to make sure my layout was right.
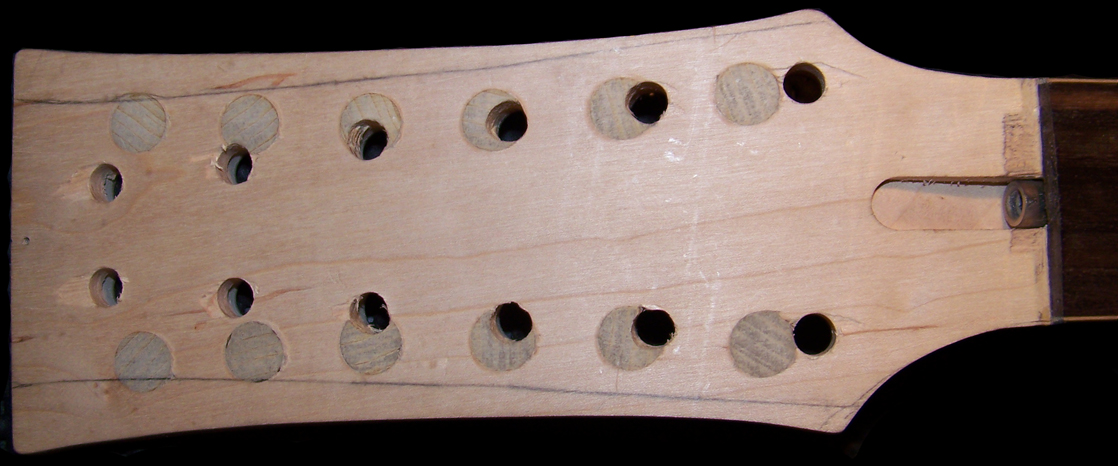
A few cuts with my beloved Japanese pull saws, and some sanding and viola, the headstock starts to take shape, but not before altering the design slightly, as I was not liking what I had come up with at first:
I like this shape better, but it is by no means finished, I have a good partial idea for it, and still have to refine it.
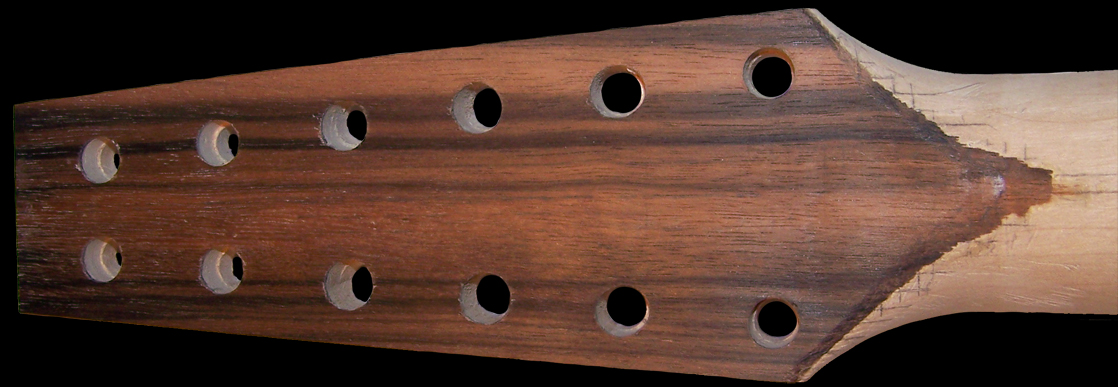
This is also the point where I have to find some flamed maple for the front of the headstock, that matches the top of the guitar as close as possible. I don't have any yet, so I will have to check with more than one supplier in order to find some. I could just use ebony, but I think it will look much better with maple, which will also allow me to bind it like the top of the guitars body, and at the same time add to the look of the back of the headstock.