Being built right now
 Inlaying the fingerboard part 1:
Did I say the inlays will be challenging? Here you can see what I mean, and since it is challenging, it would be a disaster waiting to happen without a drawing. Please don't accuse me of copying Larry Robinson's work, as he didn't invent inlaying entire fingerboards nor Art Nouveau, both of us just love the style. He is one of the best inlay artists alive. Oh, I designed the inlay all by myself of course, and never copy anything, but it's impossible to avoid similarity. If you are a musician, you already know how that goes.
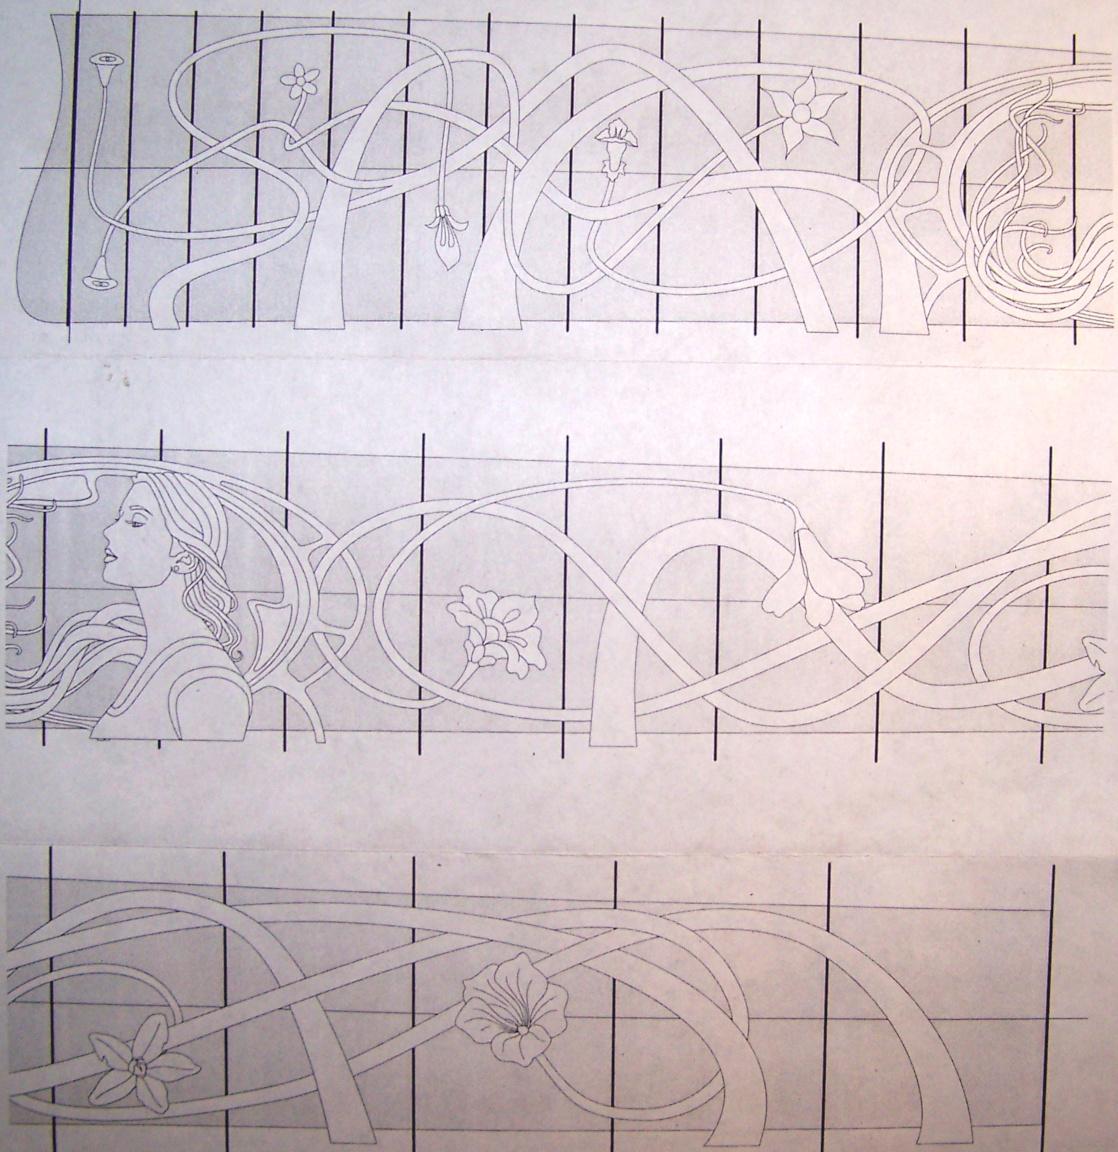
To give you a better picture, here it is laid on the fingerboard. It's not glued down yet, as first I have to add a large part of the binding, and finally radius the fingerboard. As I often do, I spaced out on taking pictures of the various stages. Where are you to remind me when I need you to?

I shaped the end of the fingerboard, as leaving it straight would look out of place on this instrument:

Here you can see that I left off the bottom of the binding, as the inlays will run off the bottom of the fingerboard. It's a lot easier to just cut the inlays flush all at once and finish the binding, than to try to work up to binding already there, which would be near impossible without messing up. I already got started with excavating wood to accept the inlays.
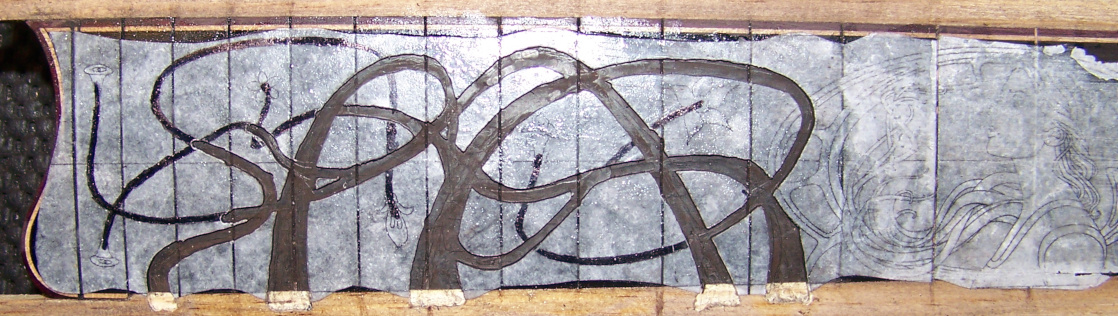
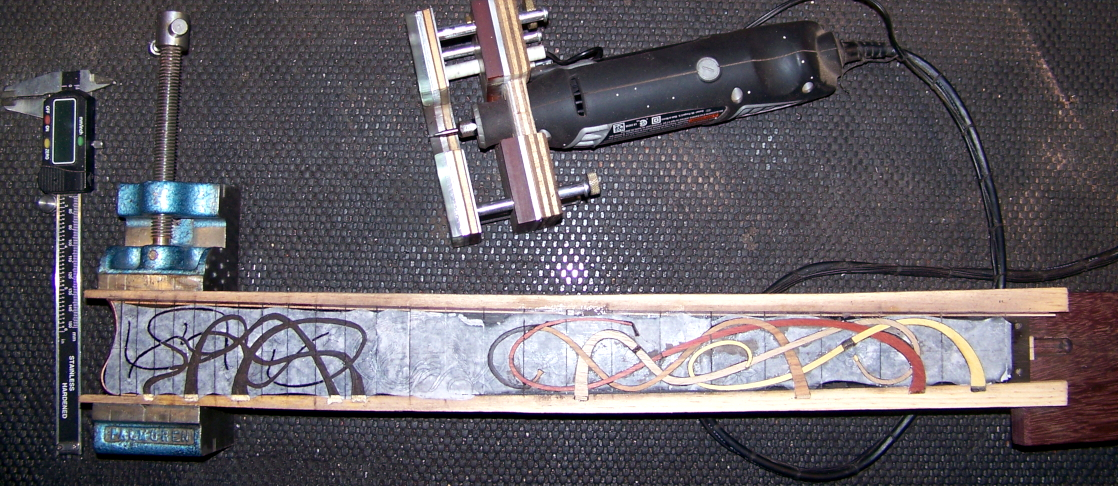
The two added strips of wood are there to stabilize the Dremel tool base from tilting off the edge of the fingerboard. I don't like heart stopping incidents! The wood strips follow the radius of the fingerboard, and so do I when excavating the wood. That way the inlays have no thin portions, that would be susceptible to breaking when hit, as well as in case it ever needs a re-fret and sanding. With proper care that should never be needed more than skimming the surface, but as fate has it, many guitars, even rare and expensive ones suffer from neglect or are involved in accidents.
After excavating some more, I began cutting woods to fit and inlaying them to make the flower stalks. It wasn't easy picking the woods by color and deciding where to use each one. There are no dyed woods here, they are all their natural color. The bright yellow wood is called yellow heart, how fitting on a guitar made with a lot of purple heart.
Below is a closer view. There are some slight gaps, but hey, I am new at this. I am cutting by hand after all, and am not a human CNC machine (yet), besides, I have seen much worse.

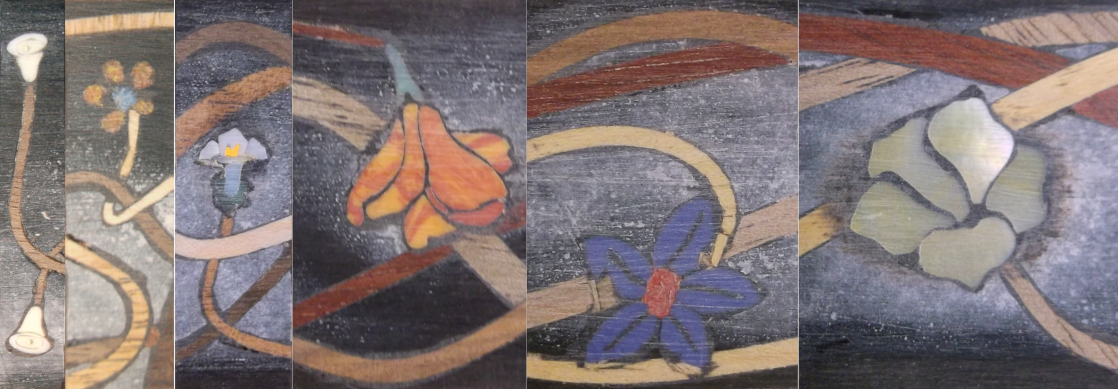
Here are the 3rd., 5th. and 7th. fret marker flowers inlaid. The third marker is made of gold mother of pearl. The fifth is made of a hard blue plastic from a coat button, with ground up orange BIC lighter plastic. The seventh is made of reconstituted Swirly "Sun stone".

Here are the 17th., 21st. and 24th. fret marker flowers inlaid. The seventeenth marker is made out of mother of pearl with yellow enamel and green bakelite (ca. 1930) from an industrial blank to be carved into a radio knob or buttons. Bakelite is the first plastic made from synthetic components. The twenty first is made of ground up plastics, but I don't like it and will replace it with reconstituted stone of some kind. The twenty fourth markers are each made of 3 pieces bear bone with a tiny brass dot. They were very hard to make because the pieces are so small that they are hard to hold on to.
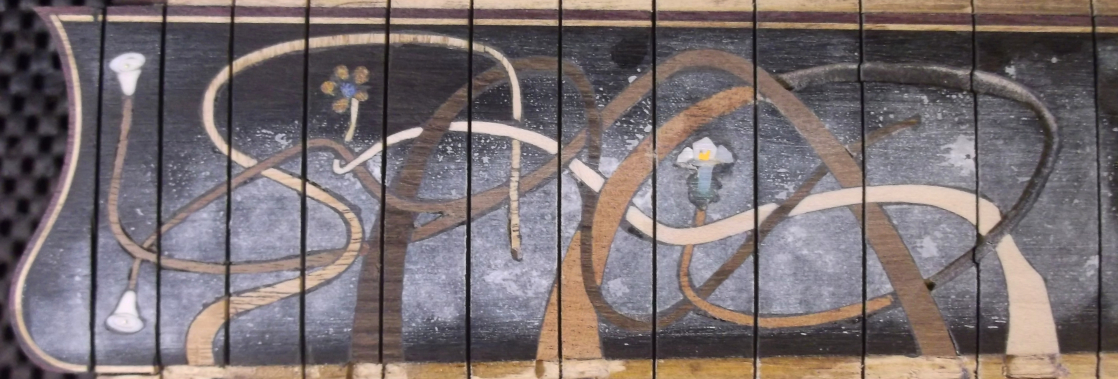
Finally a closeup of all of the flowers. I still have to make the 9th., 15th., 19th., and redo the 21st., so four left to go. I am also going to replace a few of the wood pieces, as some of them got damaged while excavating for the flowers and trying to fix them didn't workout so good.
Sorry but that's all I have for now. I hope to get more done soon, but with the repair business in full swing, and another guitar and a very complex bass in the works, the reality is that it will be a while. When I get more done, I will add more here.