The build pt. 3:
We arrive at the point of make or break, as setting the neck is one of the most critical jobs of guitar building and repair. The angle of the neck joint must be correct, so that the portion of the fingerboard that attaches to the top does not kink up or down. Because the fingerboard should have a slight incline from the nut to the bridge, the neck joint is not an easy to work with 90°, but because of my diligence in attaching the fingerboard, and reworking the neck joint earlier, it only took a few slight tweaks, and I could glue it in without worry.
With the neck in place, it finally comes time to apply the finish. In this case an oil based finish, that will not be high gloss, but more of a satin finish. High gloss is not indicative of the roaring 20's, and although glossy when wet as shown below, after sanding smooth, oil is near impossible to get to a high gloss. It is a great finish for acoustic guitars because it does not mess with the tonal response of the wood, and with its small body, this guitar needs all the response it can get.
It is going to take quite a few coats of oil to build up an even flat non porous surface, so during drying time I can put my attention towards other things.
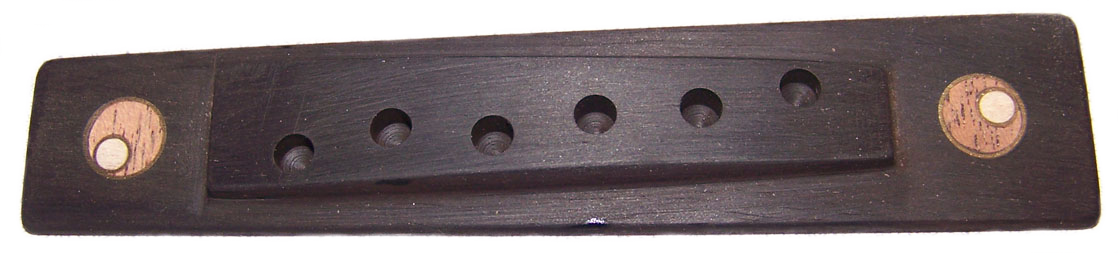
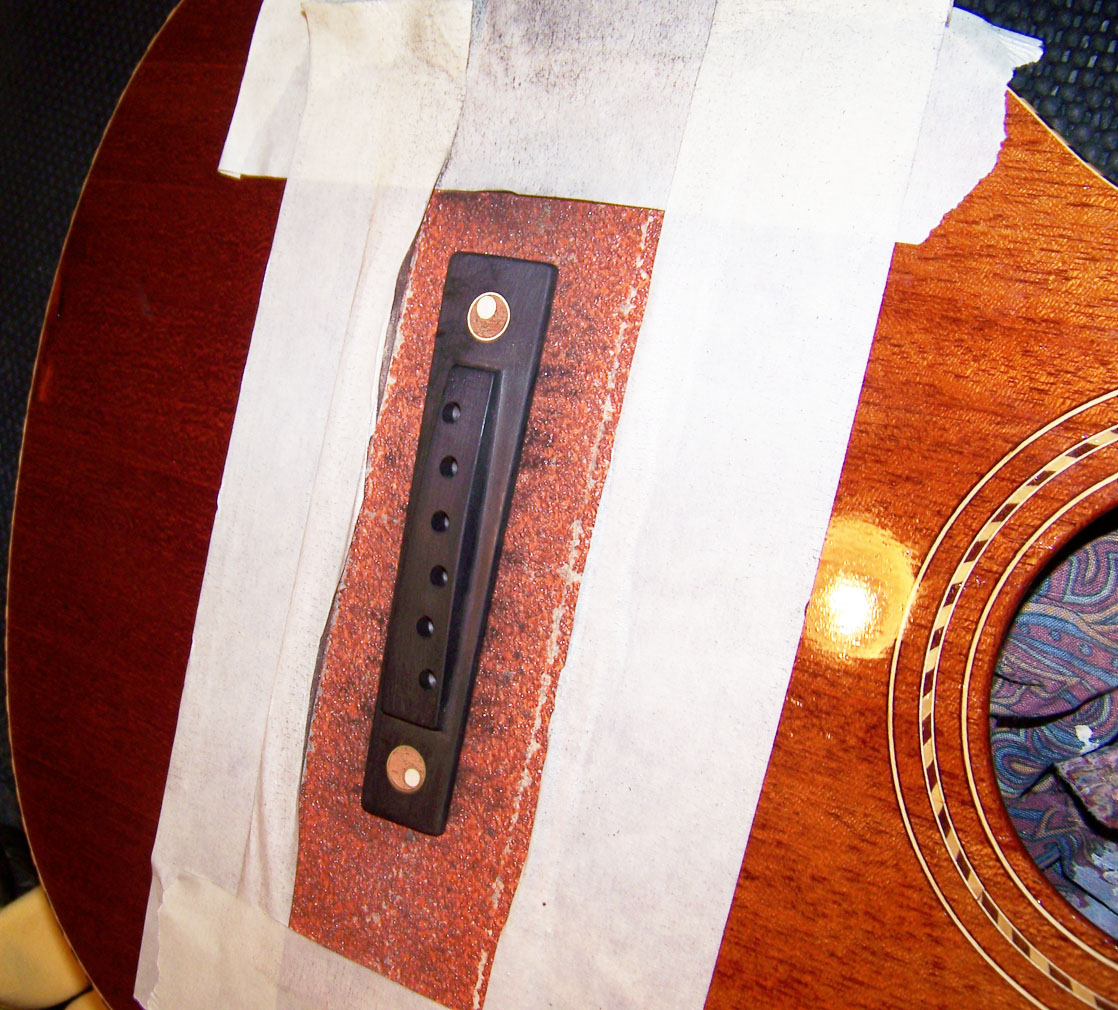
I was not going to reuse the bridge, as it was not compensated for intonation, nor did it have any other redeeming quality to it, so I opted to make a new one. I fashioned it with the same tapered angles of the headstock for consistency and since I also needed to make a nut out of brass to match the tuners, and the tail piece which had brass peaking through the scratched up nickel plating, I made brass saddles for it.
Here is the bridge prior to making the saddles:
I also failed to mention earlier, that the fret position markers were odd on this instrument. The 3rd. fret one was missing, and the one that should have marked the 9th. fret was on the tenth instead. After that there were none, and this guitar has 18 frets. I was restoring it for a beginner, and fret markers come in handy when learning. I removed the 10th fret marker and carefully filled the hole back in with a filler made from glue and ebony dust, and made some groovy new ones for all the frets to be marked using brass mahogany and maple, and even adorned the bridge with a couple of them. I failed to take any pictures of these processes though.
I decided to finish the fingerboard with polyurethane, because it was made out of a soft maple, and would wear out and look bad in no time. Since I incorporated brass into the inlays, the polyurethane would also prevent them from tarnishing. I took the picture much later but just had to show it here.

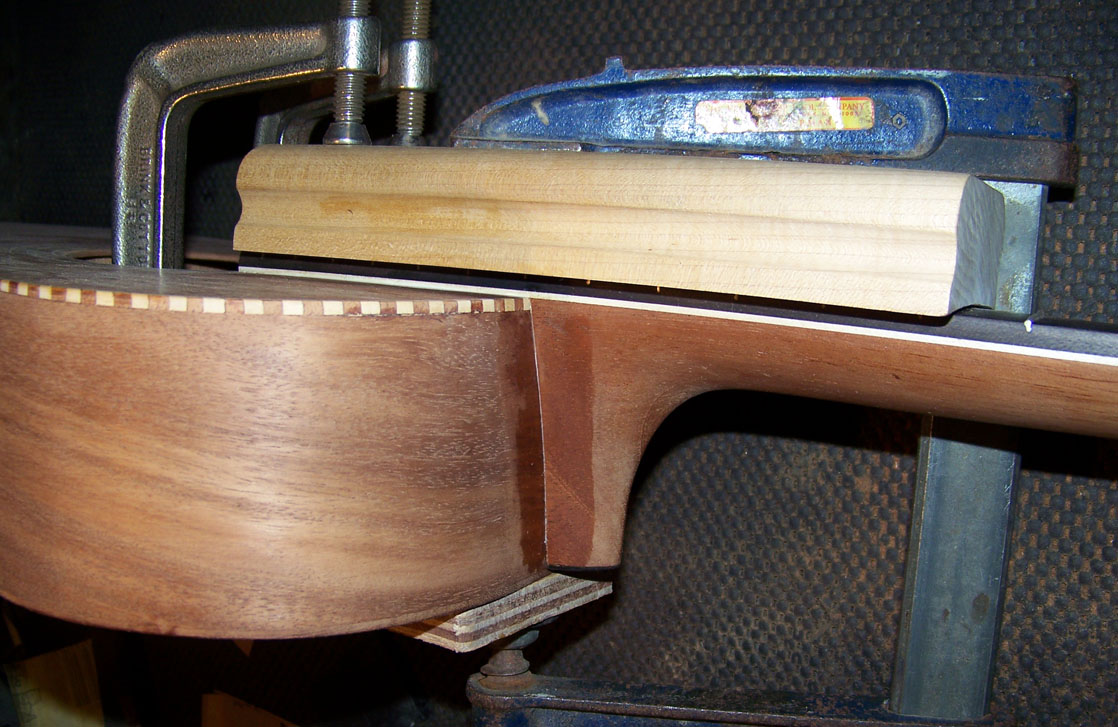
This is how to fit a bridge to conform to the top, without problems.
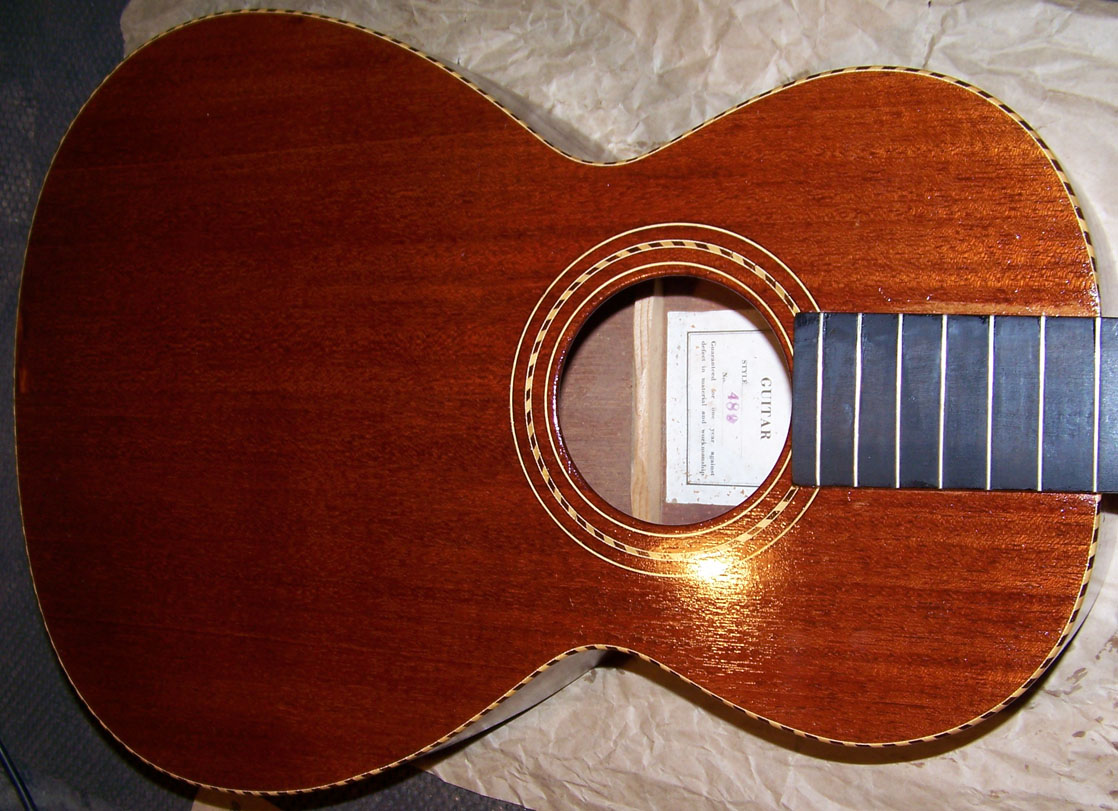
Here it is after fitting, and with a few coats of oil finish. As you can see. I intend on making round saddles, and the bridge is already compensated via the use of mathematics. Fine adjusting by filing later on will adjust it for any small deviances caused by drill wander.