 The build pt. 2:
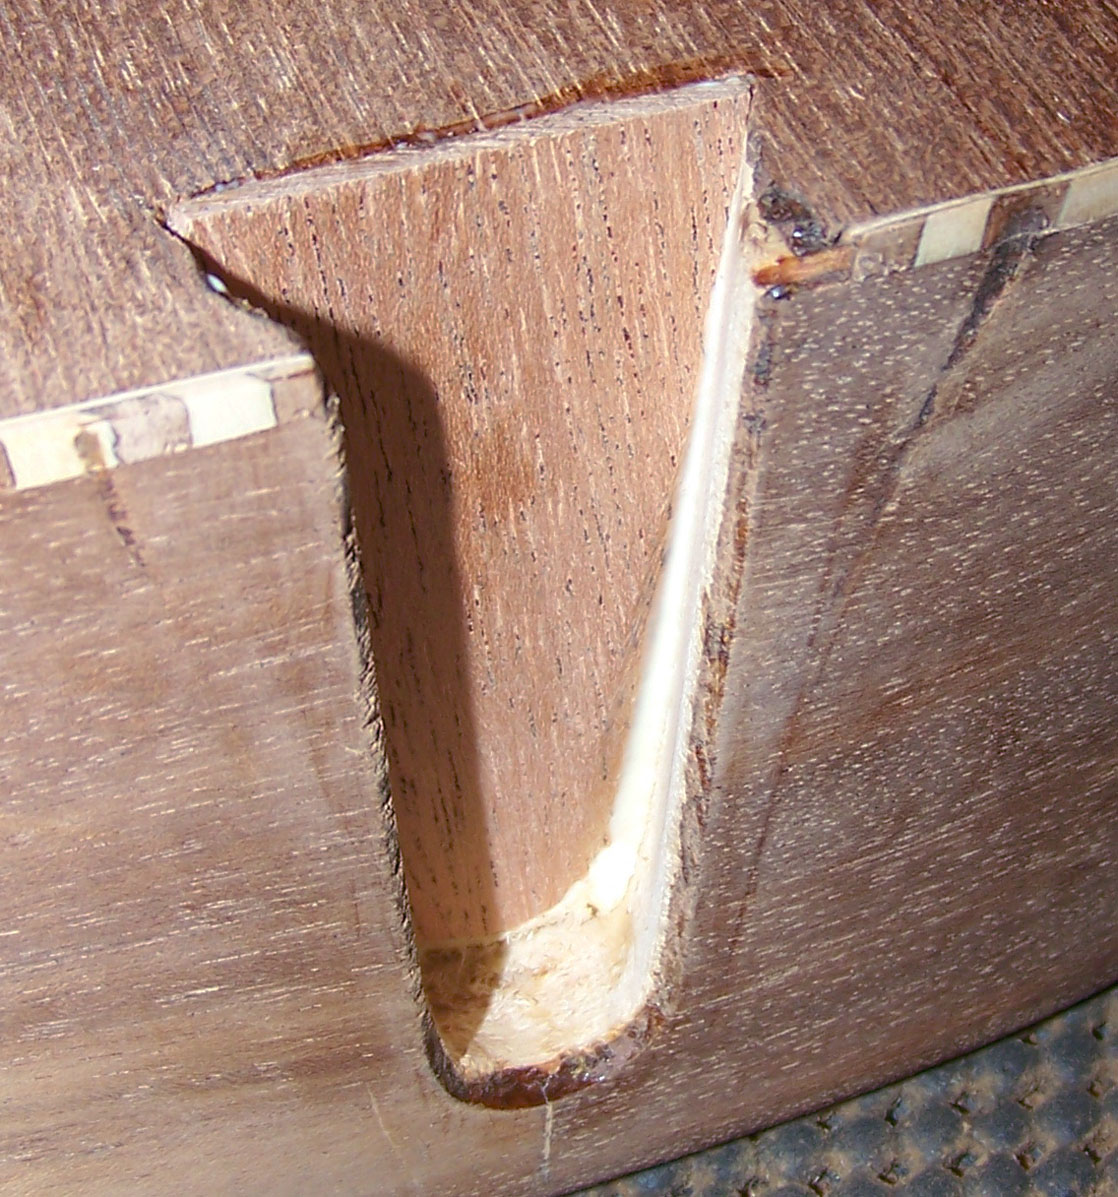
I added some pieces of wood veneers to the dovetail on both the neck heel, and in the pocket on the body to create an accurate and tight fit so that I did not rely on mere gobs of glue to hold the neck in. It is also aligned right now.
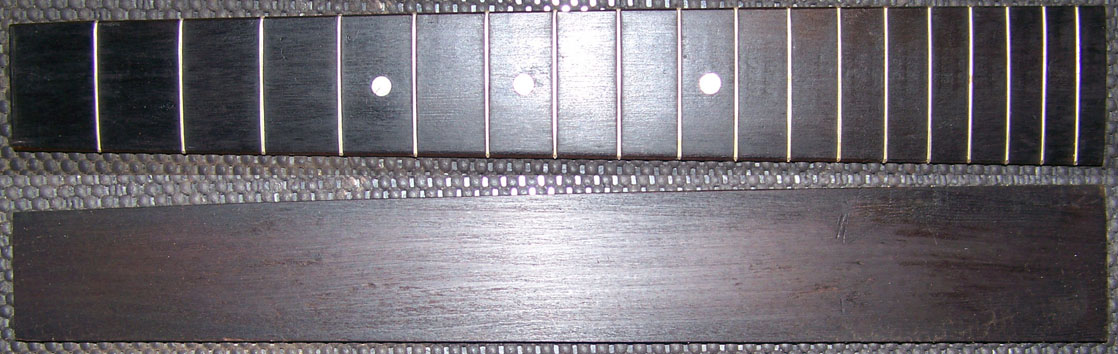
Did I mention that the fingerboard was Ebonized? Well, it is actually an industry term for dying wood Black under pressure, and by doing that the dye penetrates deep into the wood, or all the way through, depending on how hard the wood is. Looking at the part of the neck where the fingerboard was glued on I can tell that the dye and the glue did not get along with each other that well. In this case I think sanding the bottom of the fingerboard first would have had better results, and sand it I did because after all of the years it was not very straight anymore, and of course there was plenty of dye and glue stuff that had to be removed.
I also filled the cracks while I was at it, and oiled the fret side several times over a few days, to replenish the natural oils it had lost over the years. Typical problem caused from being in a hot attic for a few hot summers. It being a softer variety of maple just made it worse, and some of the frets were loose before the oil treatment, but were snug afterward.
I sanded the top of the neck clean too, and between it and the fingerboard I had removed just under 1/32" of material, and strapped the fingerboard to the neck and did some test fitting. I found that not only was the action going to be high because of the fingerboard being thinned out, but the top was actually slightly concave. I might have gotten away with a bridge that also holds the strings, but this guitar had a tail piece, and was not braced for anything else. The bridge needs to be higher off of the top to get enough string pressure on the bridge.
I had to add wood between the fingerboard and neck, and used some really hard maple for that. I also reinforced the neck in doing so as it had no truss rod. First I glued the maple to the fingerboard, then both to the neck as one.
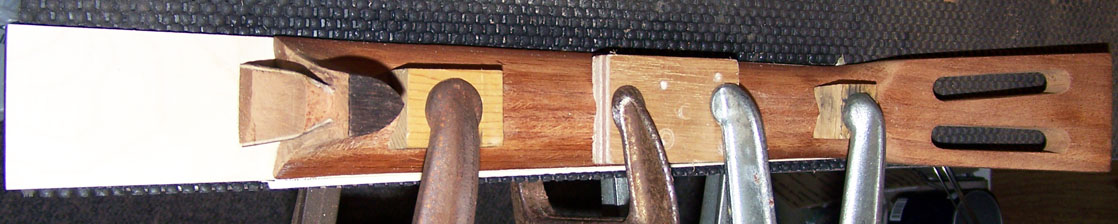
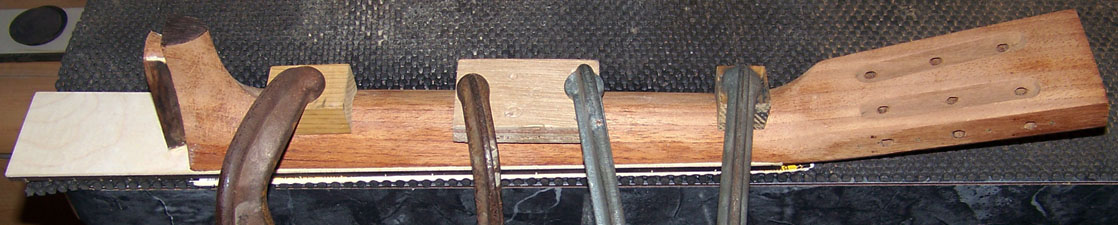
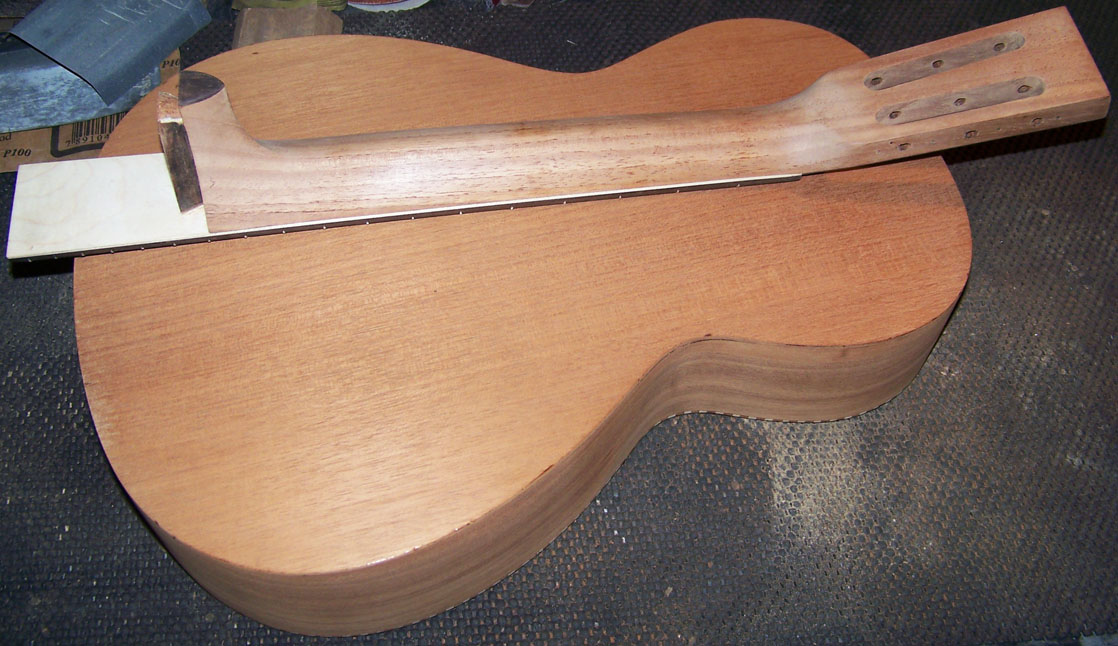
The hard part is gaging how much the string tension is going to bow the neck, and without a truss rod it can not be adjusted. There are ways to get it as close as possible though, and although not easy to see in this next picture, I deliberately back bowed it ever so slightly, by using some thin cardboard shims between the table top and neck. I still had enough fret height to fine tune it with a fret job which it never had done right at the factory to begin with.
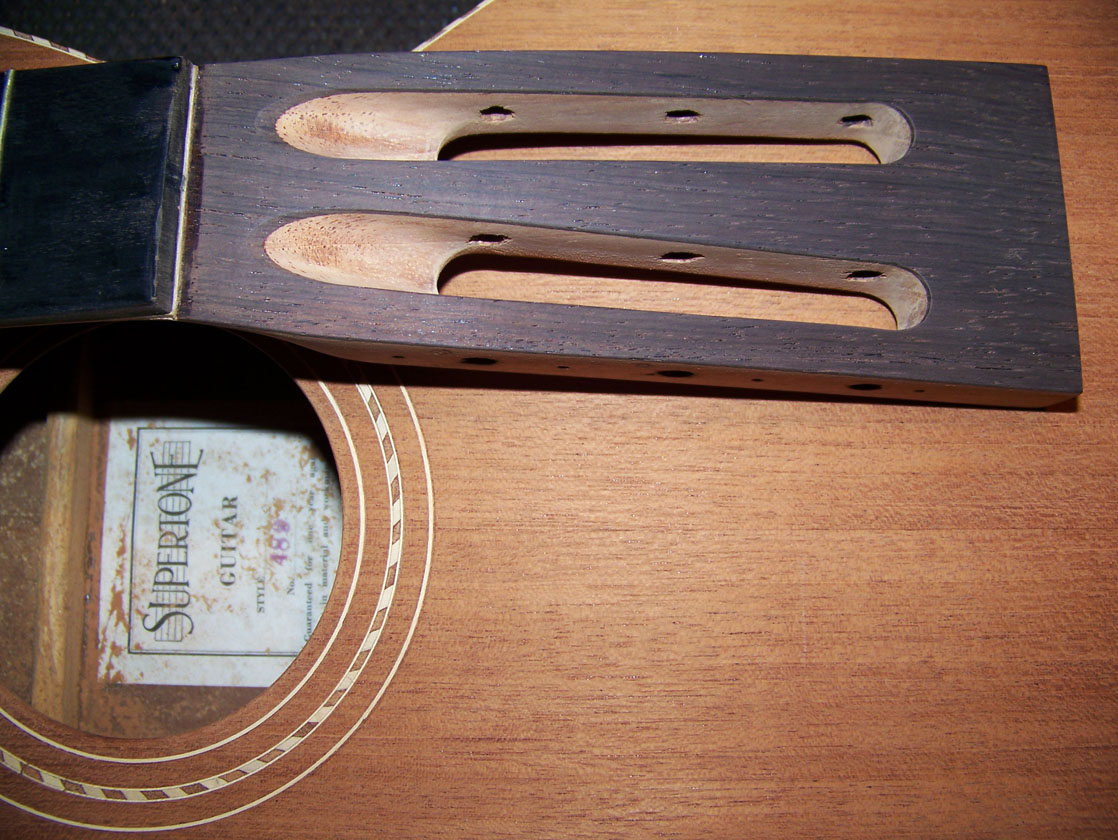
I sanded off all the finish down to bare wood, the entire instrument, and wouldn't you know that it had a thin rosewood veneer on the face of the headstock. You may also be able to tell that I evened out and lengthened the slots where the strings go to the tuners. They did not have much room for fingers, and had grooves in them where the strings used to rub up against them. They were somewhat crooked too, but I had enough room to play with to get them straight.
Stripping the finish revealed the wood grain, and it was apparent to me that the lacquer they used back then, did more to conceal it than bring it out.
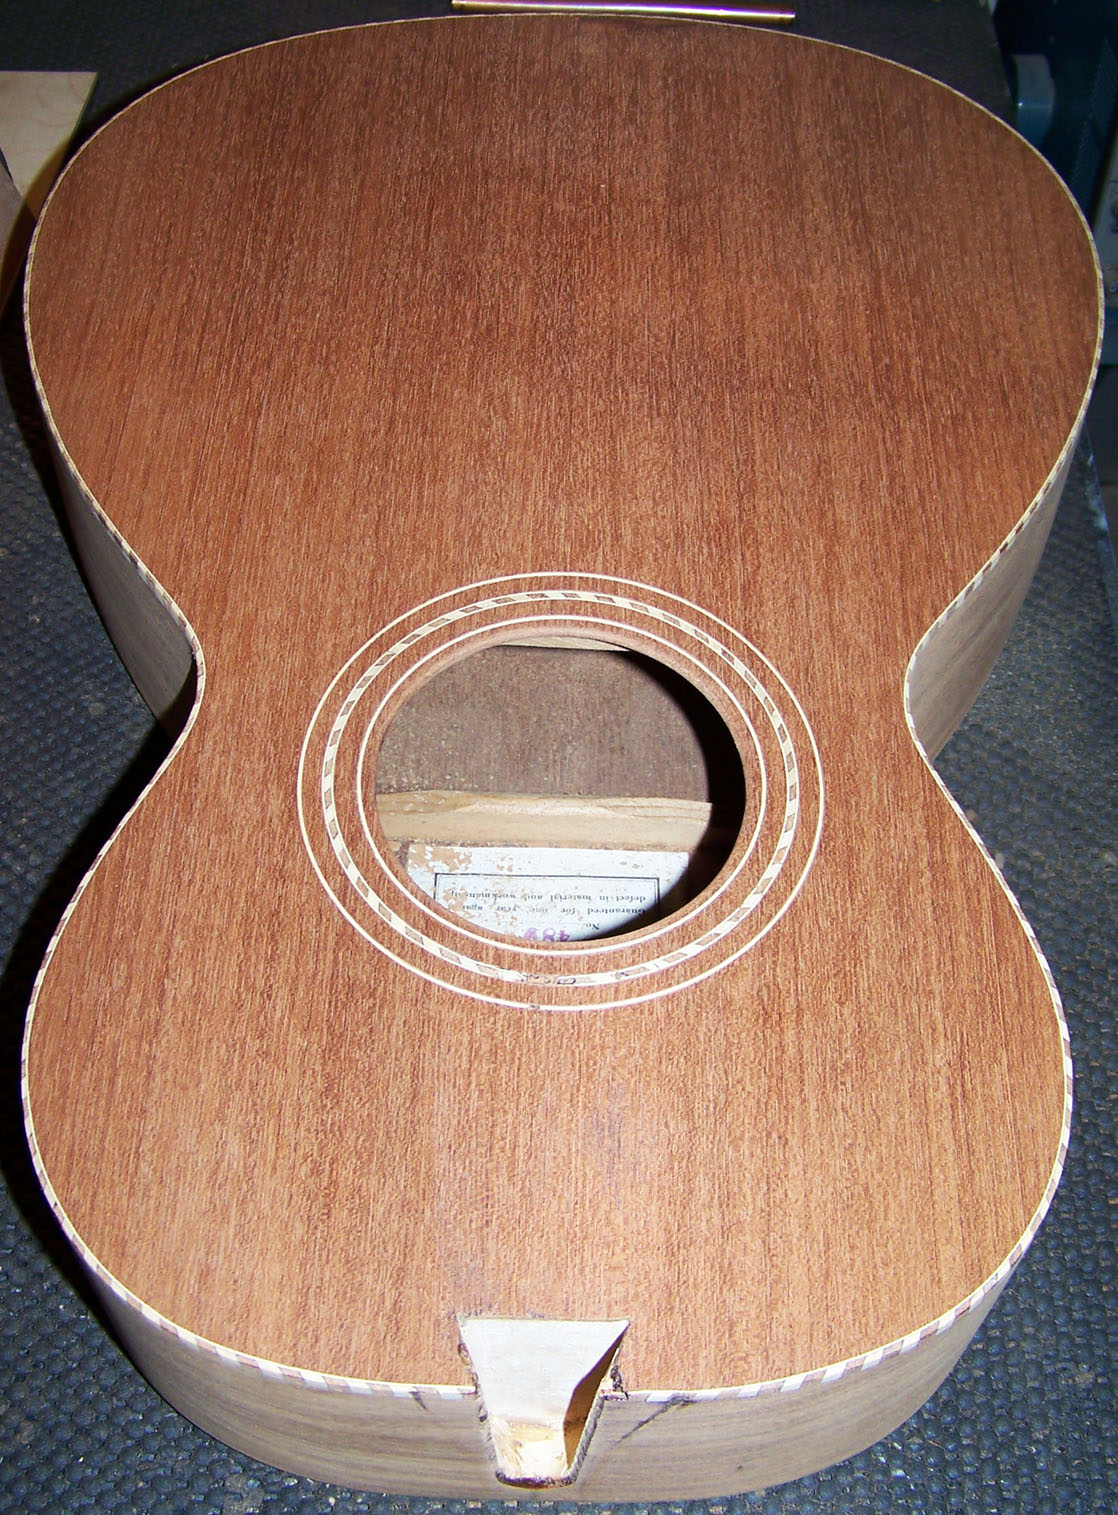
Now to repairing the nasty glue filled gap in the side. I have to start by cleaning out all of the glue, but after that I have two choices: Close the gap with pressure, or fill it in. If I use pressure, it will distort the back and create a dent in it, so I opted with filling it. It was already filled with glue, but that looks bad, and when I fill wood, I use wood. Here are the before and after, keep in mind it's a close up, and prior to fine sanding and finishing.
