Tremolo Woes:
Floyd Rose's are really popular tremolo units, for many reasons, but durability is not on the top of the list for some, especially with "Licenced" versions.
Like is all too common in this business someone drops off an instrument with one problem, but it turns out to have more than one, or the fix is not as easy as hoped for. In this case it was both.
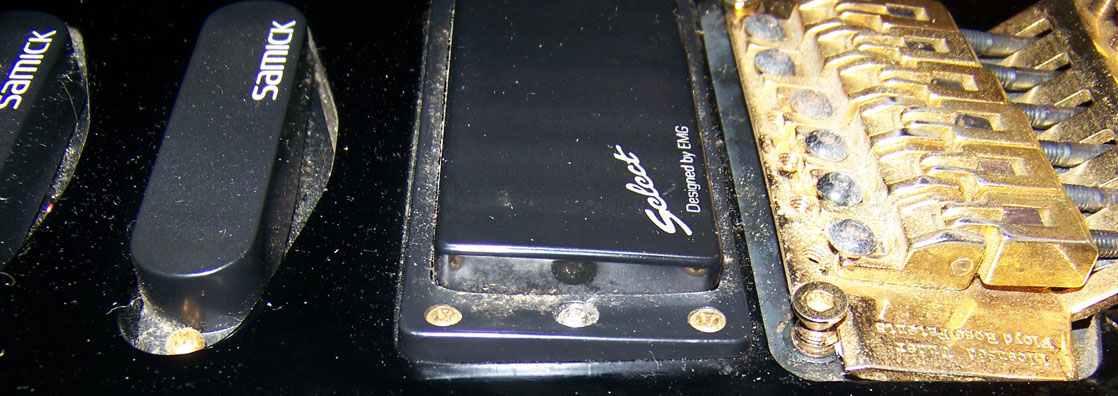
This late 90's Samick came equipped with one of the many "Licensed under Floyd Rose patents" tremolo units, which often lack in quality. This one was reported to be fine until the guitar that was on loan to someone for a few years, was returned a little screwed up. The main problem was that one of the posts was loose, and teetered when doing the whammy thing and messed with the intonation.
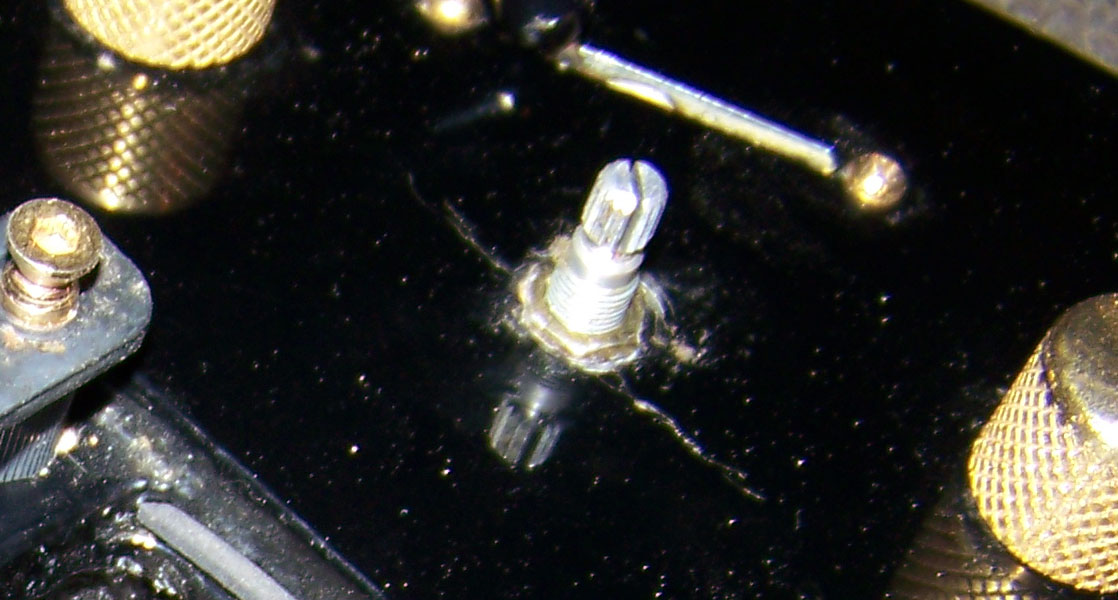
The guitar also had a potentiometer/switch combo with a 5/16" shaft crammed into a 1/4" hole where a coil tap switch used to be. It not only had caused obvious damage to the wood, but the switch did nothing at all, because it had only one wire going to it! This potentiometer was in series with the volume potentiometer, so you had to use both knobs to turn the volume all the way down, they add up to 1 MΩ.
The bridge pickup was in backward, mounting ring and all. If it sounds funny (out of phase) and the controls do not work right or at all, then maybe there's something wrong, right? Someone failed shop class big time, including the part where you ask for help, when you are at a loss!
The repairs
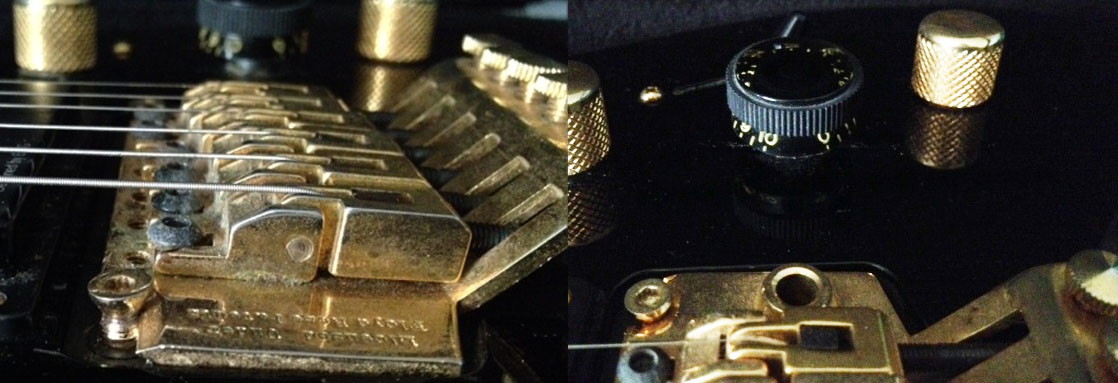
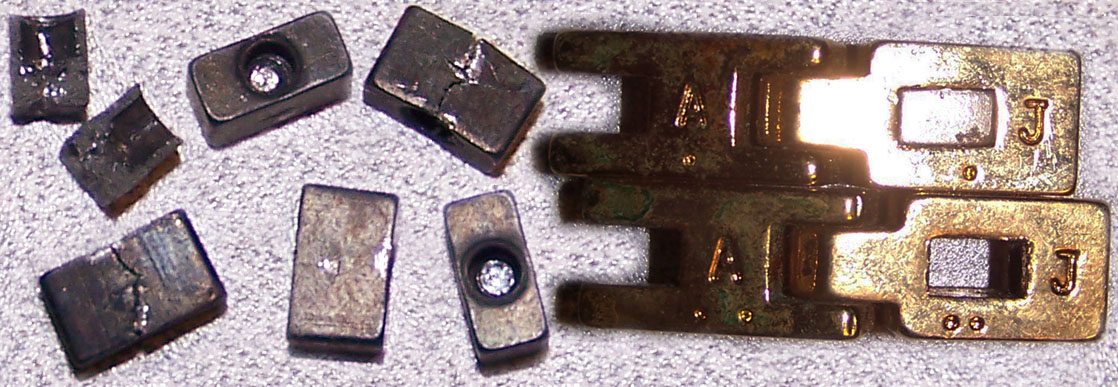
Did I say that I often find more than meets the eye? In order to fix the tremolo I had to take it off, and since after that sort of repair a setup is needed, and I don't do those without new strings, I proceeded to take the old ones off. The screws loosened just fine, but most of the string clamping blocks were sticking, and not just a little. I had to use a screwdriver to pry them back, and from experience I knew what that meant: The blocks were malformed and most likely some were even cracked. I pried them out, and not only were all but one damaged, but a few of the block retainer plates fell out as well, and one was missing altogether, which you can see in the bottom of the two saddles in the picture below.
Add to that, the post's pivots were worn unevenly and so were the "Knife edges", with large burrs and deep gouges. When I pulled the bridge out, I also found that the post anchors were press fit onto a steel plate, which had two rather small screws holding it down to the wood. None of that is standard by any means. I extracted the plate with the anchors and it came out so easy that it explained why the thing was wobbly. You can even see that the lacquer in the hole was hardly touched.
The Anchor holes showed no pressure marks, meaning they did not just wear out, but were always to big to have the anchors press fit into them which is standard for that type of anchor! The whole thing was relying on those tiny screws, and to make it worse they were centered in between the anchors where the least amount of stress was, instead of offset to maximize hold, therefor virtually useless.
Finding a solution
I spent some time on the old WWW searching high and low for matching replacement blocks, but could not find any. While I was at it, it dawned on me that it was a much better idea to just get a whole new tremolo. I called the client, and gave him the verdict. Although he was not planning on spending that kind of money, he had to agree that it was time for a new one. I measured the post spread, and string radius at the saddles and we both searched for a fitting replacement.
Wouldn't you know it, nothing with the same post spread, and my email to Samick has not been answered yet, a whole two weeks later! **UPDATE: Over a year now!<** Oh well, there is more than one way to skin a cat, but please don't ever do that! I don't give up easy, medium or hard, and if it don't fit, I will make it fit.
I started looking for a reliable replacement that would outlast the old tremolo enough to make it worth the price, and my client was looking for the least expensive alternative. I recommended the Schaller Lockmeister for around $290 as best, then an original Floyd Rose (made by Schaller) around$240, and in third place the Gotoh GE1996T at around $140. He suggested a set of dirt cheap knockoff saddles under $20 or a Floyd Rose Special for $85, but I had to point out that the saddles only take care of one of 5 issues, and that if he pays me over $120 to surgically implant a time bomb, he will get what he payed for. I also explained to him that in the case of the Floyd Rose Special, the "Special" is more like in "Special needs children". Lucky for both of us I found a gold Gotoh GE1996T for a mere $111, and begged him to jump on it, and he did.
To the operating room, STAT!
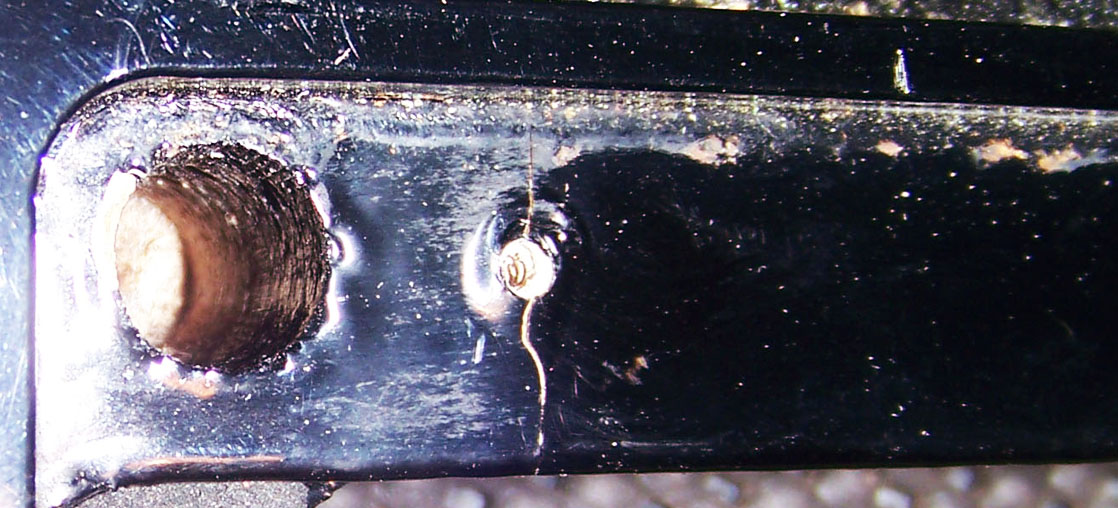
I always wanted to say that. Let the surgery begin, starting with drilling out and closing the old anchor holes with snug fitting hard maple, and shaving them flush with the surface. The factory holes were way deeper than the anchors adding to the reason for failure, One was broke through into the rout for the sustain block, but strangely not the one that was teetering. Well that won't happen when I'm done.

That was the easy part, and since the new bridge has it's post anchors closer together by 4 mm, and no way to adjust them in any direction, they must be drilled precisely the first time. I have to account for a slight difference in the saddle screw placement between the old and new bridges, otherwise setting intonation could become a problem. I also have the opportunity to correct the way the strings line up along the fingerboard, as it was a tad off. I did not have any other choice, but to adjust where the bridge goes, because the guitar had a set neck.
Still not an easy job, did you know that drill bits can wander? Even fat drill bits can pull a little off course, if they meet with two different materials next to each other or on wood joints with grain running in two different directions, and here we have both, maple in some Asian hardwood that is similar to mahogany, and rock maple with a finer and denser grain structure. But there are methods to keep it to a minimum. There are no recommendations as to what size drill to use for the 11.3 mm Anchors as it depends on the wood they are going into, to small and the wood can crack inserting the anchors, to large and they wont hold well, and fail somewhere down the road. Gloves, scalpel, forstner bit...
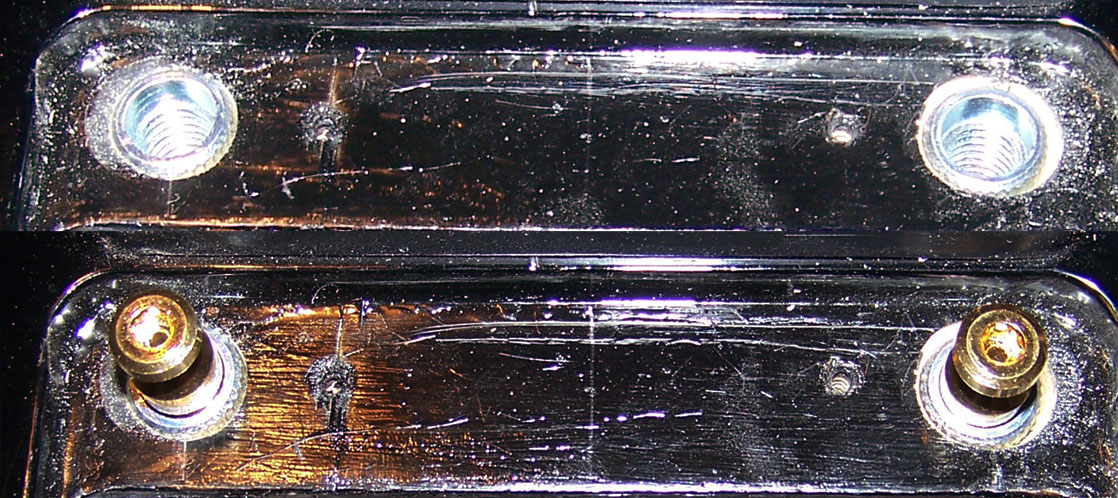
With the holes drilled at 13/32" (10.31 mm) I checked to see if the anchors could be pressed in, but they were to tight. I moved up to a 27/64" (10.76 mm) drill, and checked again they were still a hair to tight, but since the next drill size up would have been 7/16" (11.11 mm) and too big, I used an old trick to widen the holes ever so slightly, and sure enough, the anchors let me press fit them into the holes with a very tight fit, but without cracking the wood. It just has to feel right, and I can not explain it any better than that. Here is a picture of the anchors in their new home:
Not out of the woods yet, I checked to see if the tremolo fit, and could pivot freely on the posts, and lucky for me they were spot on. The last step before doing the wiring, restring and setup, was to lacquer the surface of the tremolo rout to be clean and smooth, in essence blacking it out. I did not go as far as to polish and buff it, as it looked much better than it did before I started any work, and it is not seen very well anyhow. I forgot to take a picture of that.
Buttoning it up:
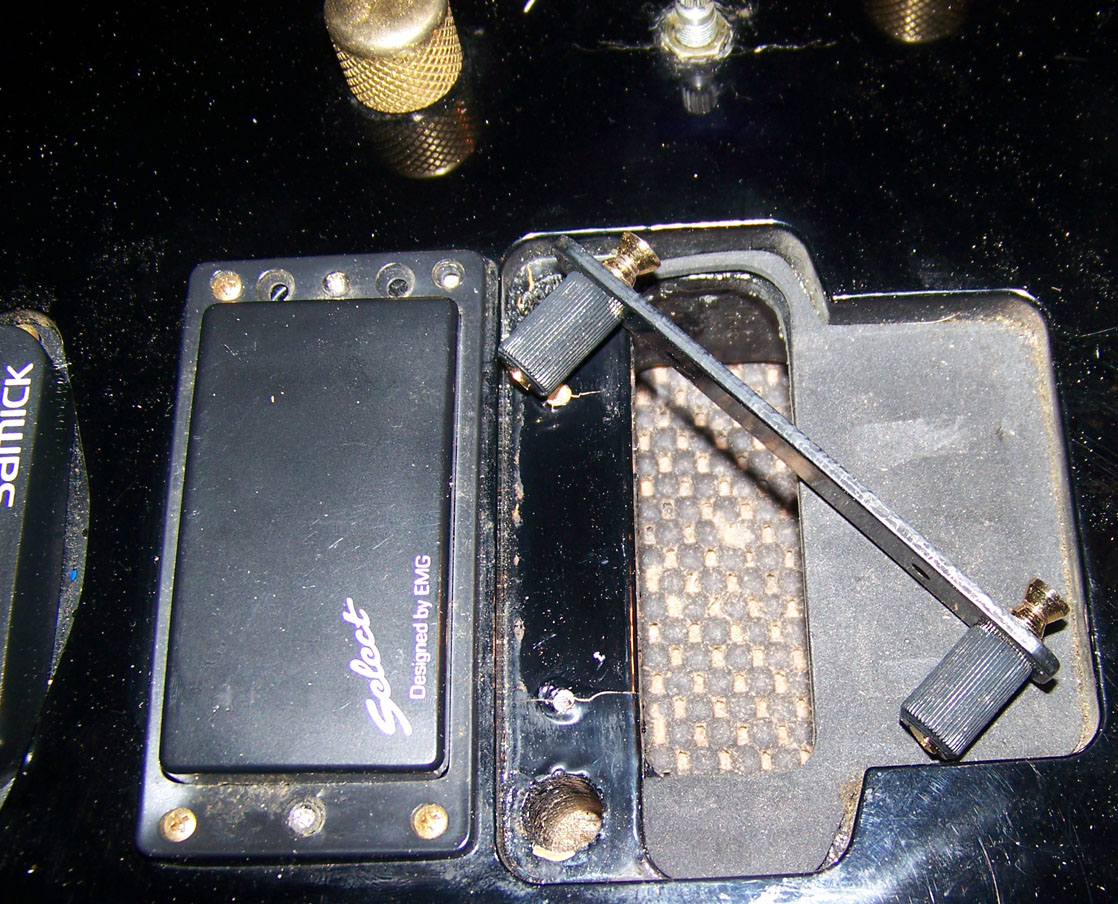
I Fixed and refinished the damaged area where the switch goes, sanded the tops of the pickup casings to get rid of the logos, and polished and buffed all of that too. I wired everything to factory spec, and threw on some new strings. The strings line up as planed, and therefor better than before, as the high E string was originally too close to the edge of the fingerboard and causing trouble. Now both E strings were equally spaced from the fingerboard edges, and line up with the pickups better too. On closer look though, the tremolo is closer to the right edge of its rout in the body, but it is better to have everything in the string path aligned right, and this slight cosmetic inconsistency, than the other way around.
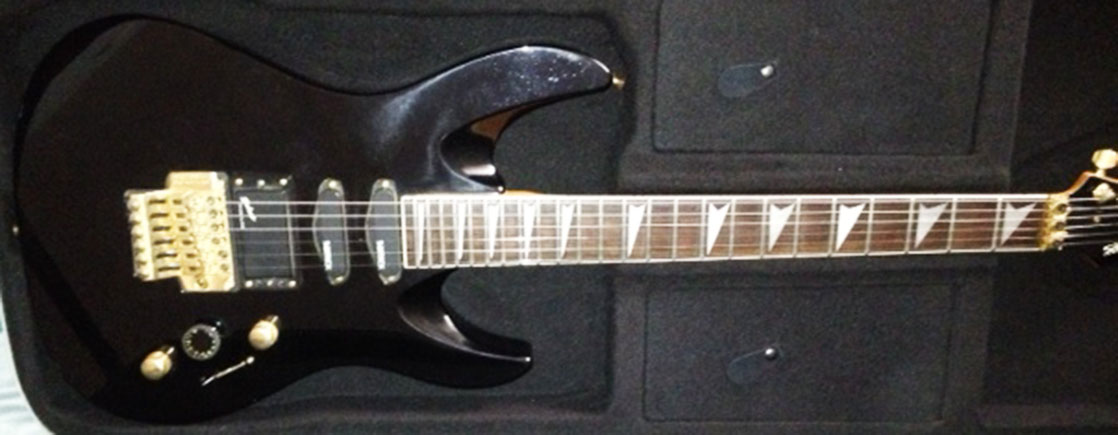
Here you can see the newly installed tremolo and the switch in place over restored damaged area. I was thinking of polishing out the volume and tone knobs, but the plating was already worn through in spots, and I did not want to lose the gold color.

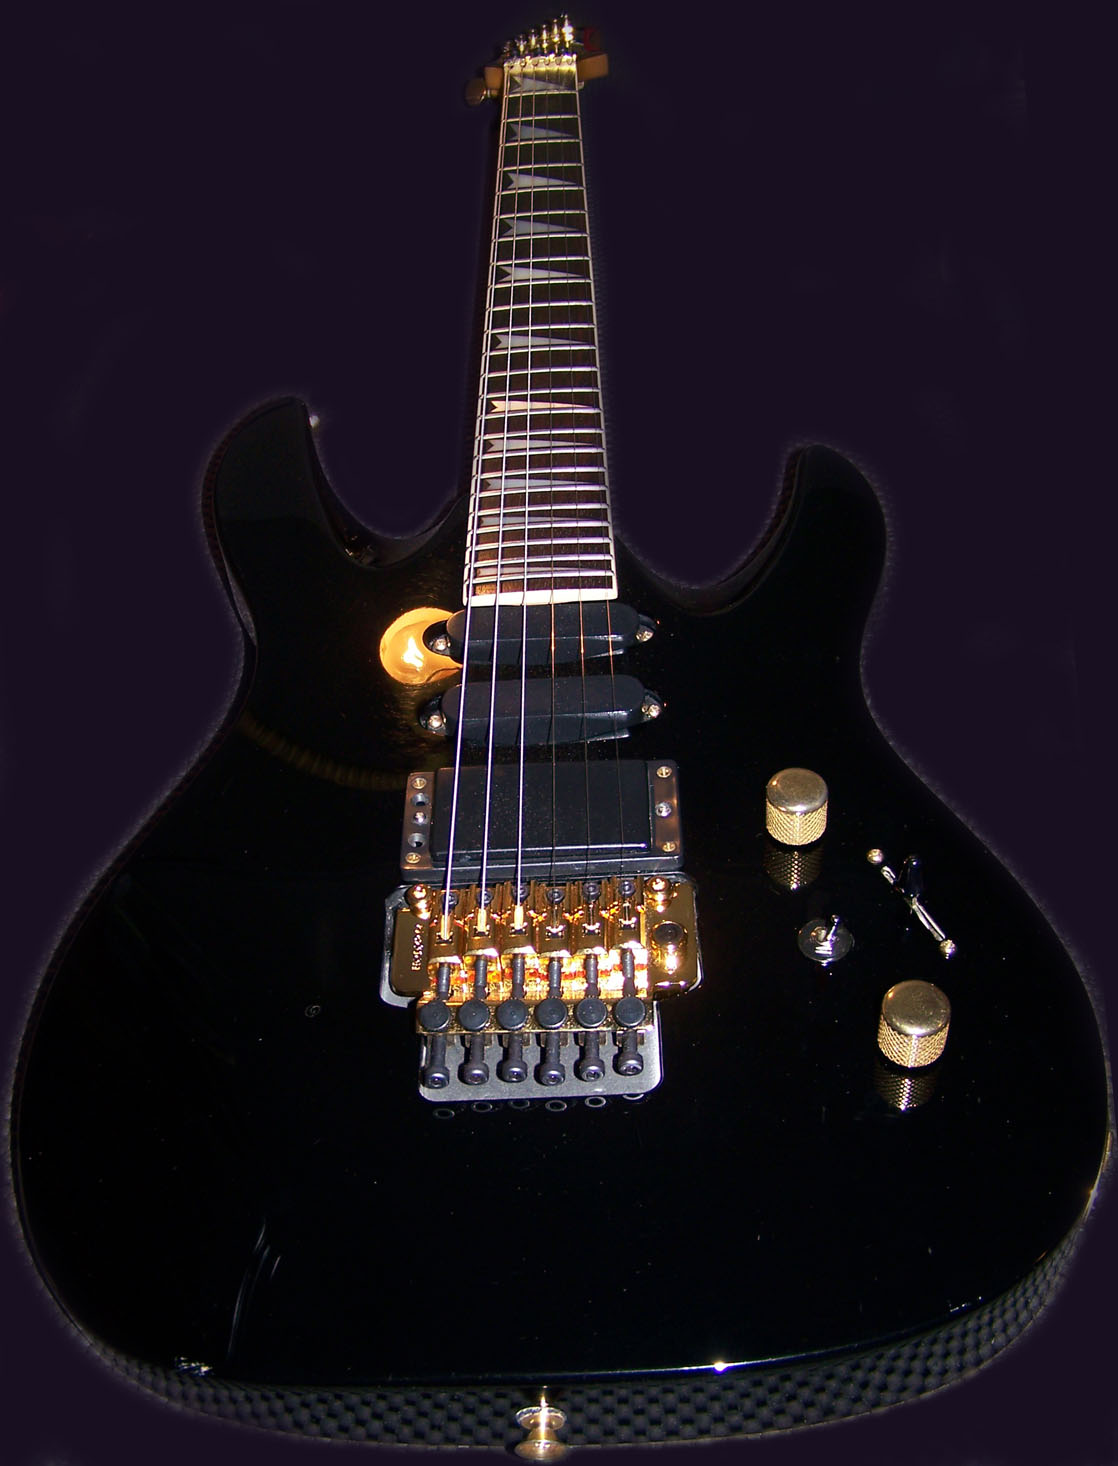
One final and more dramatic view of the whole instrument done and ready to be enjoyed by its happy owner: