To fret or not to fret?
Without going to much into details, playing a fretless instrument is not something everyone can hack that easily. Sure, if you are already used to an upright bass or cello, then the transition may be easy, but if you are used to frets, than it is a big game changer, as your finger positioning has to replace the function of the frets, and your fingering must be precise. For those who can deal with that, a fretless bass opens the door to some techniques not found on fretted instruments, like smooth transitions from one note to another and all in between, without the staggering frets would bring. My personal favorite is the elastic sounding grooves one can play.
Here, after all warnings a client of mine wanted me to convert his 5 string DeArmond bass into a fretless:
Removing the frets
Removing the frets is not an easy task, as they have barbs on them to hold them into the wood better, and therefore do not want to come out without tearing out some of the wood. In this case the fingerboard is rosewood, and it is very brittle, and tears out easier than ebony and maple. Add to that, some manufacturers use epoxy as an added measure to hold frets in, and without extreme care, one could end up shredding an entire fingerboard.
Although it can not be avoided altogether, tear out can be reduced with a few techniques I will not reveal here. Wherever it does tear out, simple superglue and pressure is used to get the pieces back into place, but again it can not be avoided altogether, so sanding down the fingerboard along with using the wood powder created by doing so as a filler for the missing shards of wood is required.
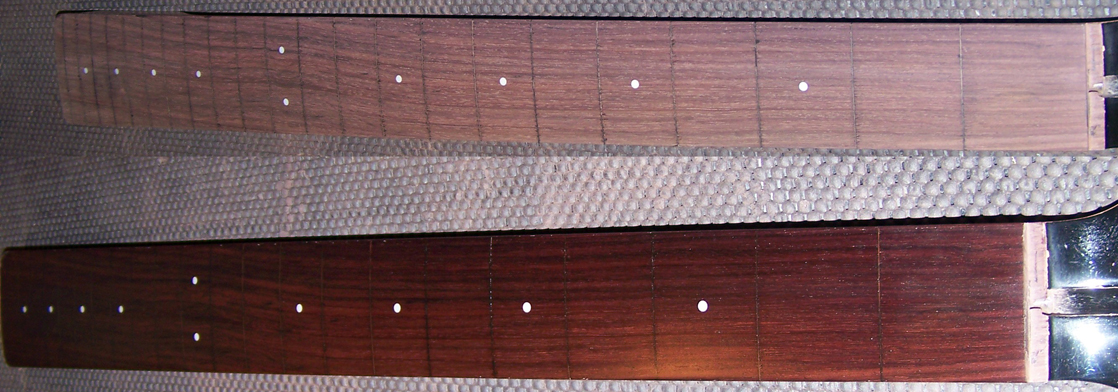
Here is a picture of the fingerboard right after removing the frets, dry on top, and wet below. By wetting down a piece of wood you can get a better idea of what it will look like when lacquered.
Filling in the fret slots:
Now it is time to fill in the fret slots, which is not just filling in itself, but the way I do it gives me the opportunity to correct any warpage and straighten out the bow, to regain some room for truss rod adjustment. They can be made to disappear altogether by gluing a veneer over the entire fingerboard after filling them, but that can get expensive, especially if the fret marker inlays are to be retained, as they have to come out without breaking them, and then have to be re-inlayed.
It is common practice to fill the fret slots with white or black plastic binding depending on the color of the fingerboard, to make them stand out, but I strongly urge against it, as that stuff is way to soft, and besides not adding strength back, can squish up out of the slots once string pressure is applied. Acrylic glass AKA plexiglass would be a better material, and comes in all kinds of colors too, but it is near impossible to find in just the right thickness. In the end good old hard wood veneers just happen to come in the right thickness, and are strong enough to do the job right, and there are many species with varying color to choose from.
In this case the client wanted to hide them as much as possible, and since one way to do that is to stain or even paint the fingerboard, that's what he decided on. I thought it would be a good idea to darken it significantly but not hide the grain altogether, and therefore staining was the right way to go.
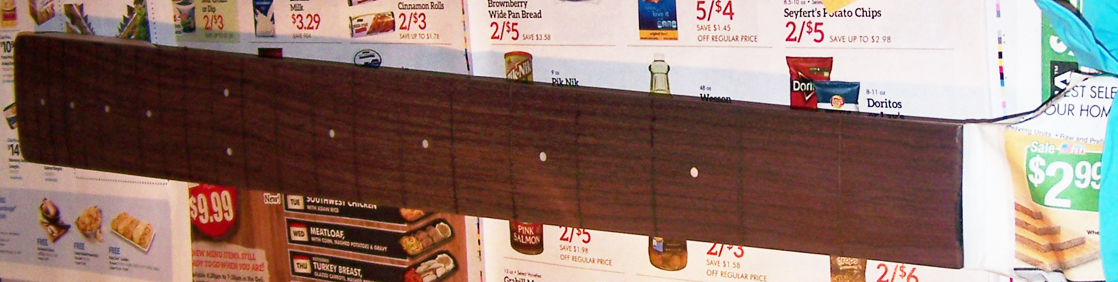
As I hinted on before, part of this all is to end up with a playable instrument, and in order to get that the fingerboard is leveled by sanding, not just to cut down the protruding filler material, but also to create the proper bow for best possible action. Here is what the fingerboard looks like after all prep, and ready for staining:
Staining and lacquer:
A few coats of stain later, and careful removal thereof from the fret marker inlays, and it looks like this:

Although it is nearly totally blacked out, the polyurethane that it will be finished with will thin out and absorb some of the stain, and the grain will be visible once again, just much darker.
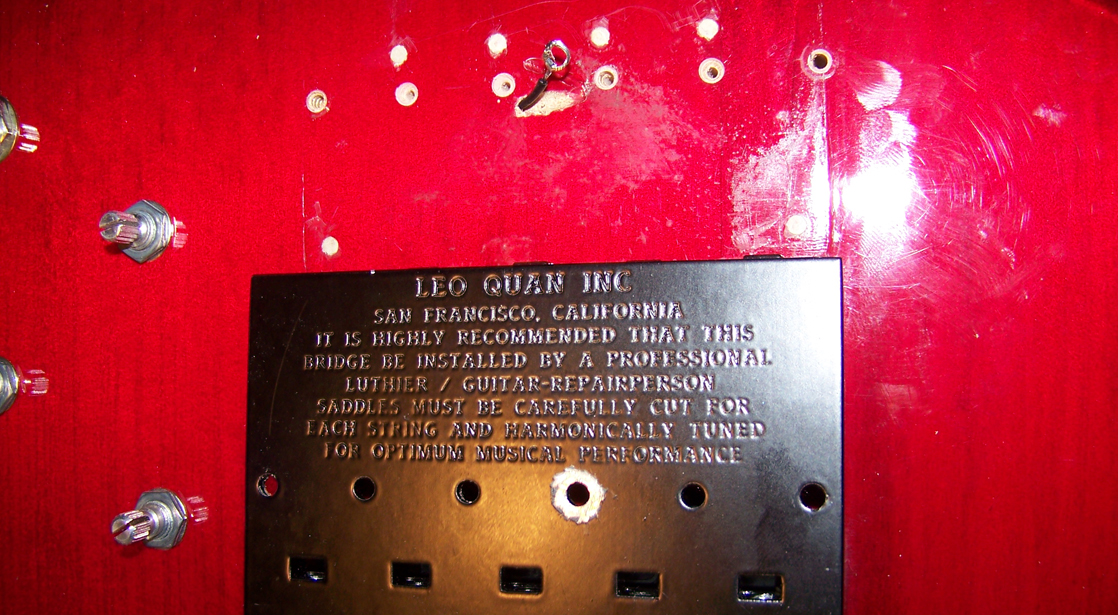
Applying polyurethane is not to hard, but waiting for it to cure can be, as one can get anxious to see the results. I for one do not push my luck and jump the gun, but instead I allow extra curing time prior to sanding, and the results speak volumes. Since the owner of this bass decided on some other upgrades, he used that time to pick out and order a new (old stock) Leo Quan "Badass" bridge, Bartolini pickups and electronics, and Hipshot "Ultralite" tuners all in black, to compliment the new look. He even got some black nylon wound "Rotosound" strings, but the silk windings on both ends are gold in color, nothing a black marker can't fix though.
After the polyurethane was completely cured I sanded the fingerboard starting with 320 grit, then 400, 600, 1000, 1500 and 2000grit. Finally I buffed it out using the best German made buffing compound on the market, to give it a glass like sheen:

A few more things:
Since the nut had to be lowered significantly for loss of the frets, I did that, and of course I corrected the sloppy factory string spacing while at it.
Well as often happens, one job leads to another, and a mere de-fret turned into a complete hotroding of this now monstrous instrument. I installed the new electronics and hardware, and although the strings would be lower because of the missing frets, I still had to tilt the neck back a bit to accommodate for the new massive bridge, and to gain more string height off of the body for better tone. Here is the new bridge ready to install. I closed the holes from the old one off, shaped the end of the ground wire to fit one of the mounting screws, and removed some lacquer off of the bottom of the bridge to accommodate it making good contact.
I notched the saddles of the bridge to set proper string spacing, and then I adjusted the action and intonation, although the latter is more or less arbitrary now, and the pickup height, as well as the friction of the tuners. Viola' or rather bass, boy this thing rocks, and jazzes! Now if I could only play like Jaco Pastorius, oh well Bootsy Collins will have to do.
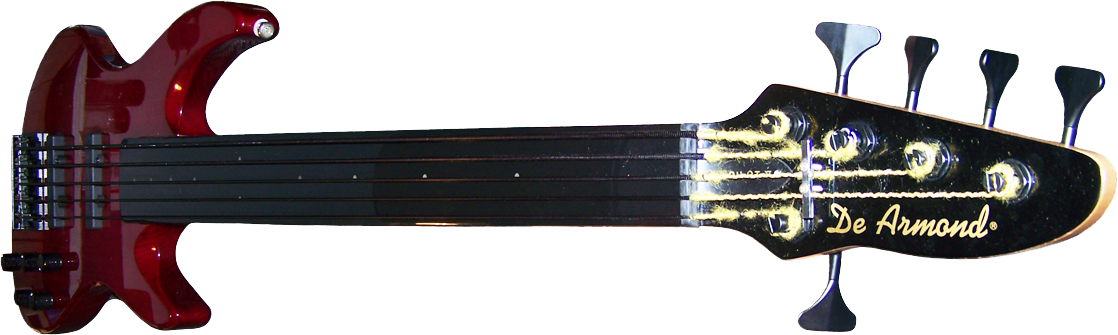
After trying it out, it's owner said that we might have to get rid of the DeArmond logo, to prevent undeserved credit. Once a superior hand crafted brand, it was bought and sold often, each time diminishing the quality. In my opinion it should either be brought back to its old glory and high quality standards, or vanish altogether. I cant wait until I am dead and someone puts my  logo on cheap crap made in china!